Thursday 22 September 2016

Spell binders freebies don't go missing out.....

I'm not sure how many of you know I'm a retailer of craft product? And run a crafty cafe 👍🏻..... 
So I don't get enough time to play 😢 everybody say "awhhhh" .......
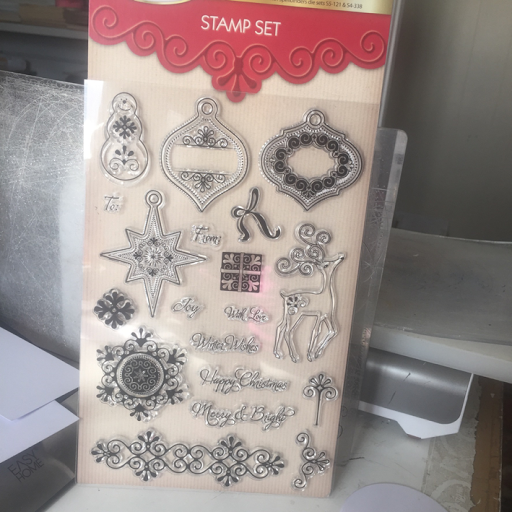
Finally today I got to play with a sample set of stamps, which are available to anyone who buys the Simply Cards & Papercraft magazines...
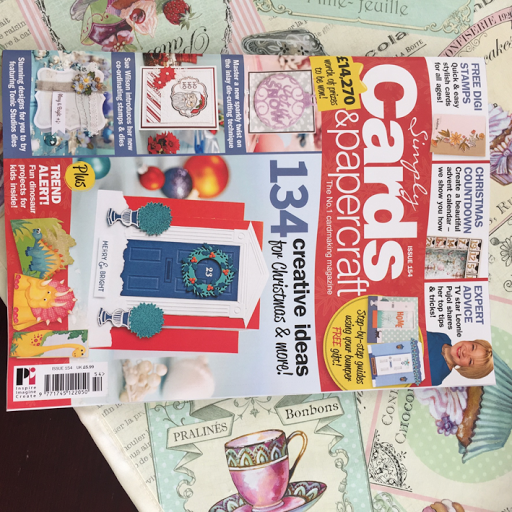
Near the back of the magazine is a page of shops and a coupon all you need do is fill in the coupon, take it to your local store in the magazine, spend £10 (now that's not a lot in a craft shop) and the store will email a copy of your coupon to the magazine company who in return will post out the stamps and embossing folder to your home. 
  
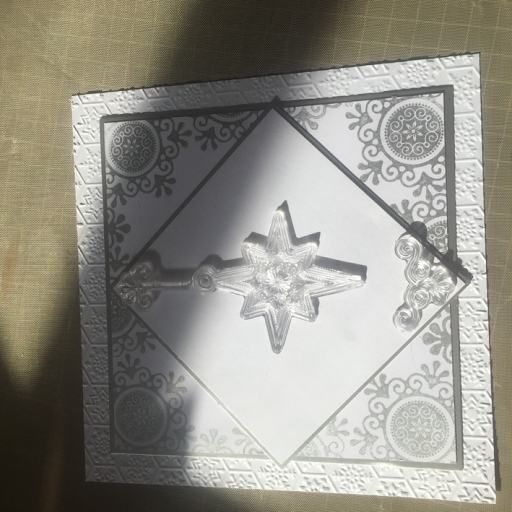
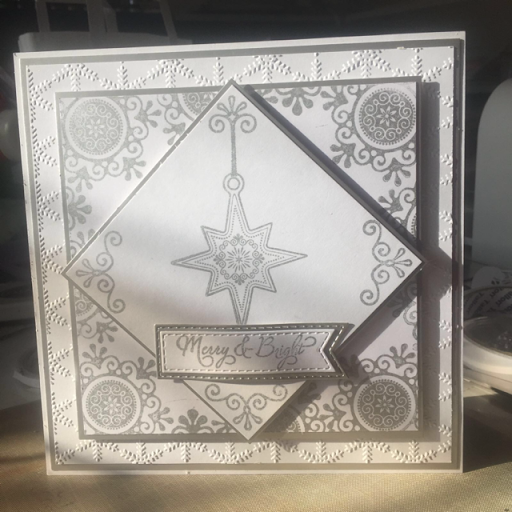
Here's my card I made today....
 
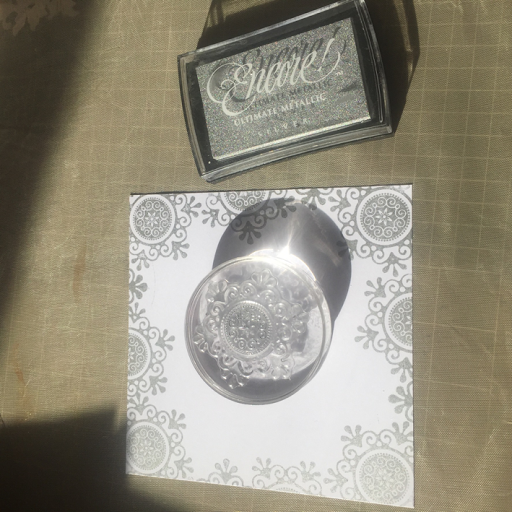
I started with a piece of card 15cm sq, I stamped the snowflake over the corners first and the filled in the edges. I used the silver metallic encore ink pad....these are my personal favourite for metallic inks. 
I mat and layered on to a mat silver card. 
 
I embossed a larger piece of white card and embossed the card with the Sue Wilson I think it's ice crystals ....🤔 
I mat and layered with mat silver and finished with white card. I originally was thinking of putting my centre as a square, so cut it down at 10.5cm sq, i firstly laid out my stamps so I could see what they might look like stamped and changed my square to on an angle.
 
 I stamped 3 corners, and the fourth I used the long slim stamp that looked like a wire for the bauble....
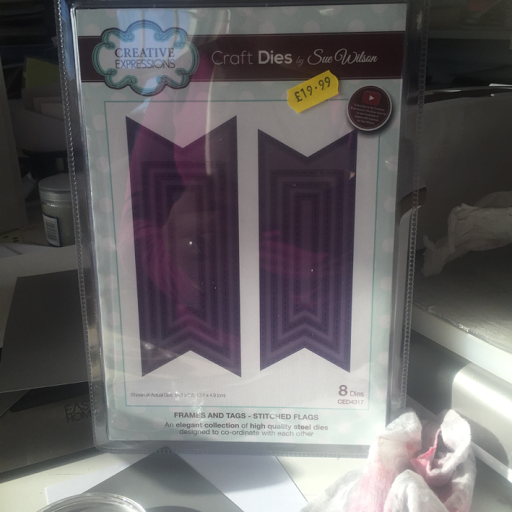
I used Sues new release tags as they great as they mat & layer also, I stamped one of the sentiments that are included in the set. They all stamped beautiful, to be honest I was a bit wary at first with the delicate designs....


Monday 19 September 2016

Little surprises....

I've had a lovely weekend away, relaxing instead of working 😊 
My good friend Julie Clark ran my crafty Saturday with the help of my eldest daughter Robyn....as it all ran nice and smoothly I'll certainly let do it again. 
Today I had to go into work (thought normally closed on Mondays) to pack up some orders. 
The girls had cleaned up, and all was nice and tidy. Robyn had also been playing with my gilding polishes, she liked the new technique we can up with for creating a mixed background....so here's my card I completed using her background. 
 
I really love this set of dies, and you know it's one set I've not taken note of the name....oops
Here's the background and colours used in polish.
   
The sponge used is like a natural sponge, bought for all of 39p from home bargains (£1+ in other shops) and it's just been cut up into small chunks. 
Dip the sponge into your polish but don't add too much, dad your sponge around the page and mix with your chosen colours. (Can be done with paints and ink also) 
I cut out 4 borders & 4 corners with the backgrounds in white, layered them up on my card. 
 
For my center I used the matching background die, cut out the largest one, cut this in half then glued together to create something near a square 😕 
  
I layered up with a pierced square firstly in white, then changed my mind and used it in the coloured card. Added some pretty ribbon and large stamped tag...
 
 Hope you like my card, if you have any questions please don't hesitate to contact me... 
 

Sunday 18 September 2016

Crafters are so similar.....

I've often seen horrid comments on some of the most beautiful cards, I.e you copied that off....,not your own design....etc etc
Well today and many other days, I've seen cards that are very similar to ones I've made previously. 
I don't always share all my cards made, but I do love how crafters who have the same product can see how different dies work together. 
Today's card was the one I was meant to post the other day, but I liked my poppy card more....
 
For my card I have used the coconut white and rich plum foundations card, I started by cutting out the centre striplet die 3 times, and then found the best pierced square that fit to help with my layering up. I layered my cut card onto the rich plum card. I layered onto the white card using foam tape, and mat and layered again onto the plum & white. 
 
I took my outer die from the Gillian set and cut both layers together. I then used both Gillian dies to cut out my centre with the coconut white card. 
I used the plum card I'd already cut from my background pieces and glued the Gillian die cut on flat, and fastened flat inside the centre. 
 
I used a matching coloured ribbon to counter balance the flowers on the other side, which are the new release cape Daisy's and the flourish is frondils..and stamped a best wishes. (Because I generally forget to stamp my sentiment before putting my cards together 🤔) 
This card I found on Sue Wilsons craft page on Facebook this morning....just to show all great crafters think alike ha ha ha.....
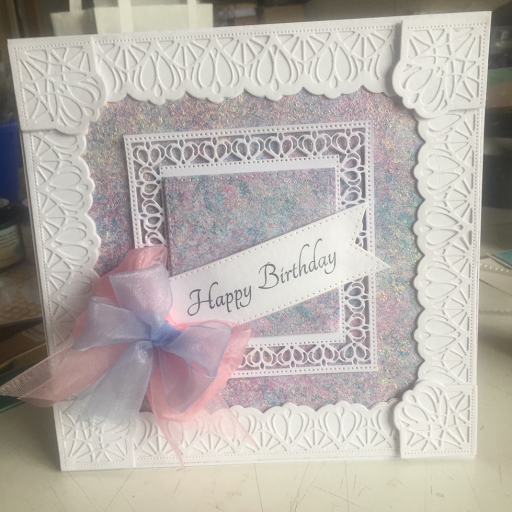
 This card was made by Sue Wilson